Design Systems
A Design System is a set of visual branding assets such as colors, typography, logos, icons, and corner radius that defines the theme applied to the artifacts you generate, such as documents, decks, spreadsheets, and PDFs. Once configured, the agent automatically applies your design system to everything it generates for you: presentations, documents, HTML outputs, and UI components. Instead of generic default styling, every artifact comes out in your brand's colors, fonts, and logo.
Design Systems are managed in Workspace → Workspace Settings → General → Design Systems (the third tab in General settings).
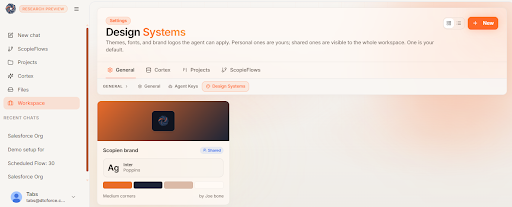
If no design system is specified, the agent generates its own colors and styling automatically for the artifact, and notes this as an Assumption in its plan research summary.
1. How It Works
a. What the agent applies
- A design system governs all generated visuals.
- When the agent builds a presentation, document, or interface, it loads the design system first, then applies your brand fonts, colors, and logo throughout.
- You can switch between design systems at any time and prompt the agent to generate artifacts according to the one you've selected.
b. Logos are placed intelligently.
- If you upload multiple logo variants, the agent analyzes each layout and decides which variant fits best: a full logo for a cover slide, an icon-only logo for a small footer mark, and so on.
c. The default behavior.
- If no design system is specified in your prompt, the agent uses the workspace default and flags this assumption in its research summary (e.g., "Assumption: the user wants to use the default design system since no alternative was specified.").
- To override it, just select the system you want in your prompt, or select one from the + menu.
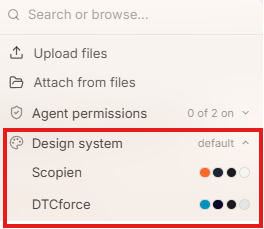
2. Creating a new Design System
Navigate to Workspace Settings → Design Systems and click New.
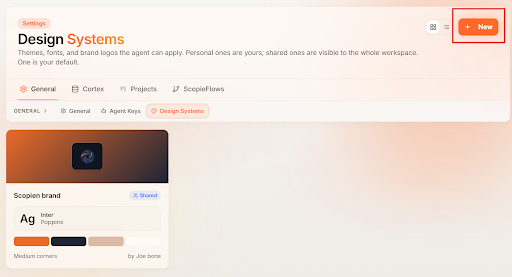
It will open the interface to create a New Design System
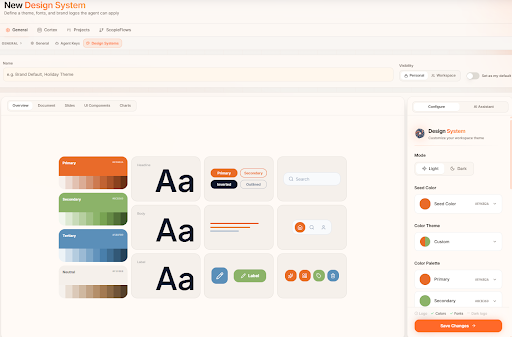
a. Mode
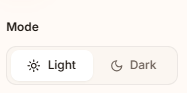
- The builder includes a light mode / dark mode toggle so you can preview how your design looks in both themes as you configure it.
b. Colors
| Feature | Description |
|---|---|
| Seed Color | Enter a single color and the system automatically maps matching primary, secondary, and tertiary tones from it. |
| Color Themes | Pick from a predefined library of color palettes and preview how each looks in dark and light mode. |
| Color Palette | Set each color field individually if you prefer full control. |
c. AI Assistant
- An AI assistant is available to help you brainstorm a design interactively. Describe the look you want, and the assistant generates a mock environment preview. Click Apply to see the theme across various interface components before saving.
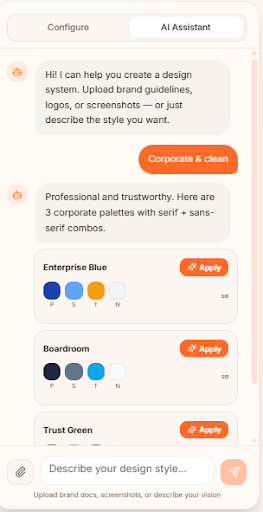
Note: The AI assistant can extract colors, fonts, and branding from an existing website URL and apply them to a design system, but saving that extracted result into the Design Systems list is not yet fully supported — this is in development.
d. Font
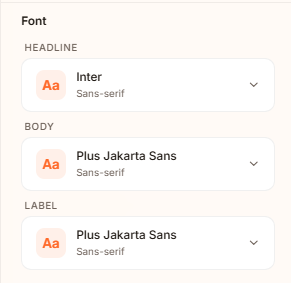
- Select distinct fonts for headlines and body text from the available font libraries.
e. Corner Radius
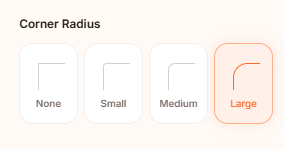
- Adjust the border and corner radius value.
f. Logos
- Upload up to three logo variants in light or dark mode.
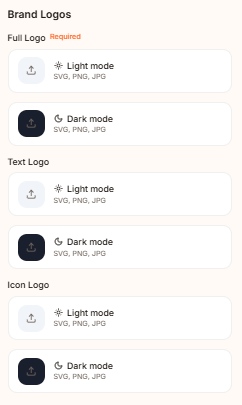
- The system automatically determines which variant to use in each context:
| Variant | Description | Example |
|---|---|---|
| Full logo | Icon + text combined |
|
| Text logo | Wordmark only |
|
| Icon logo | Symbol or icon only |
|



Note: By default, only the light mode logo is required — if no dark mode logo is uploaded, the light mode version is used across all layouts. You may optionally upload a dedicated dark mode logo.
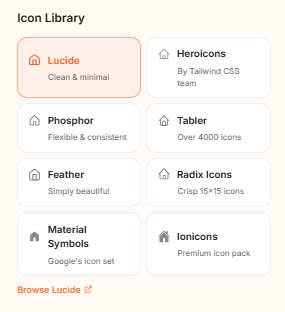
g. Icon Library
- Choose from a predefined list of icon libraries. The selected library is used when the agent generates icons within your artifacts.
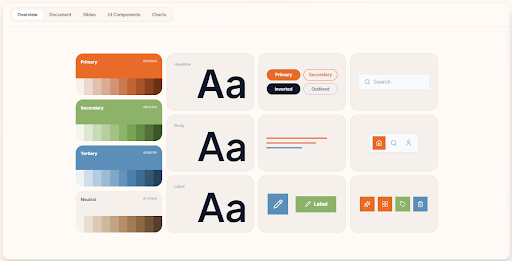
h. Preview & Save
- Before saving, preview how the design system renders across documents, slides, and UI components.
- Once you're happy, click Save.
- The design system appears in your Design Systems list, ready to use.
i. Visibility
When creating a design system, you can choose whether it's Personal or Workspace.
- Workspace It is shared with all members of your workspace. Everyone can use it for their artifacts, but only the owner (or workspace admins) can edit it.
- Personal It is visible and usable only by you. It won't appear for other members.
3. Setting a Design System as Default
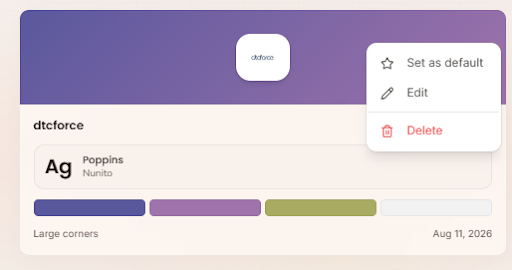
The default design system is what the agent uses whenever you don't specify one, so it's worth setting to your primary brand.
- Navigate to Workspace Settings → Design Systems.
- Locate the design system you want as your default.
- Click the three dots (⋯) on that design system and select Set as Default.
The selected system is now marked as the workspace default and will be applied automatically to any prompt that doesn't name a design system or select one from the + menu.
4. Using a Design System
Once saved, there are two ways to use a design system:
- Reference it in your prompt. Simply name the design system you want the agent to use:
- "Use the dtcforce design system for this presentation."
- The agent loads that system and applies its colors, fonts, and logos to the generated artifact.
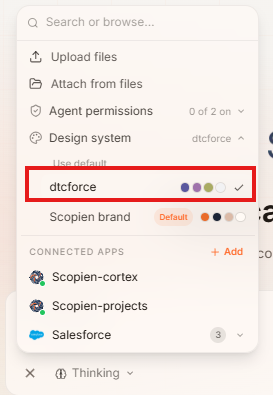
- Select it from the + menu.
- Open the + menu in the Prompt Composer before sending your message and choose the design system under Design Systems.
- The selected system is then applied to your request, no need to type the name.
Note: If you don't specify a design system either way, the agent uses the workspace default and records it as an Assumption in the plan's research summary
Limitations
- Website extraction isn't fully wired up yet
- The agent can pull a design system from a website URL and apply it, but saving it into your Design Systems list is still in development.
- AI assistant is currently a mock experience
- It generates previews to brainstorm with you, but the end-to-end flow (assistant-created systems appearing in your saved list) is not yet complete.
- One default at a time
- Un-specified prompts always use the workspace default; you must explicitly name another design system to use it.
Tips & Recommendations
- Keep your default current. Since un-specified prompts fall back to the workspace default, make sure it reflects your actual brand. It's what the agent uses most often.
- Upload all three logo variants. The agent places the full, text, or icon logo where each fits best, so providing all three gives you the most polished results.
- Use the seed color for speed. If you're starting fresh, one seed color generates a complete, consistent primary/secondary/tertiary palette in seconds, then fine-tune manually.
- Always preview both modes. A palette that looks great in light mode can fail in dark mode, check the toggle before saving.
- Name your system clearly and reference it in prompts (e.g., "Use the dtcforce design system") so the agent never guesses.